
How to Install WordPress using WordPress Toolkit in cPanel
WordPress toolkit allows the installation, configuration, and management of WordPress. The first step is to ensure you have WordPress Toolkit configured for your WHM. Log in to your WHM and check for the below:
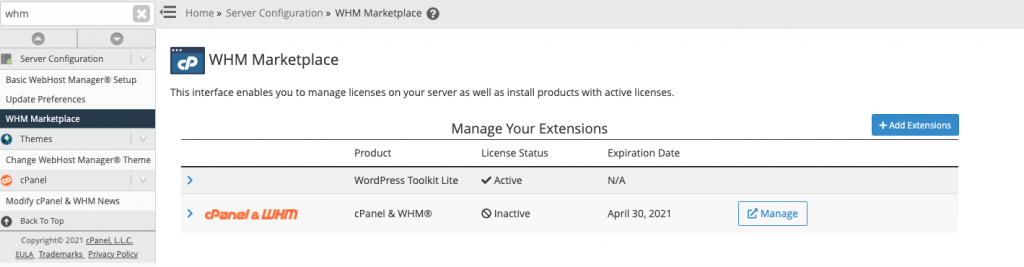
If not, WordPress Toolkit can be added by clicking ‘Add Extension’ and then proceed with installation of the WordPress Toolkit.
- Login to your cPanel.
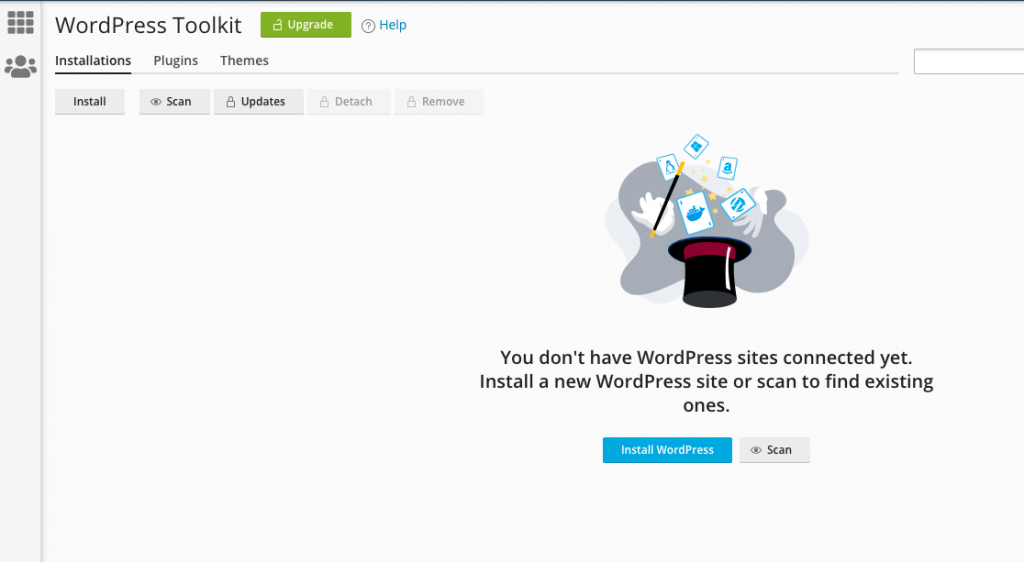
- Inside, Applications, click on WordPress Toolkit.

- Click on the Install WordPress button
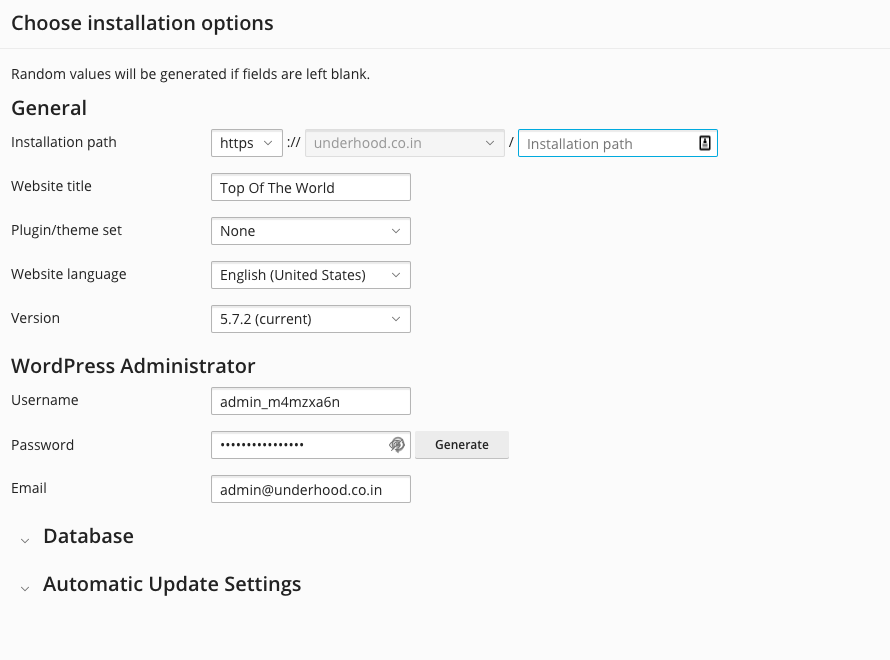
- It will take you to the installation page. Fill in all the details for your WordPress website.
- Installation Path: Select the path where you want to install the path. You will see your WordPress files and directories on this path.
- Website Title: Enter your WordPress Title.
- Plugin/theme Set: Select the set of plugins/themes you want to install for your WordPress.
- Website Language: Select the language for your website.
- Version: Select the latest stable version.

WordPress Administrator Details
- Username: Username of your WordPress admin account.
- Password: Password of your WordPress admin account.
- Email: email address of your WordPress account.
- Add the MySQL database details. Enable the WordPress auto-update and plugin/themes and click on the Install button.

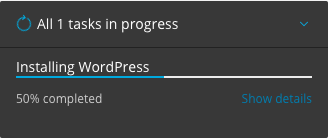
- You will see the installation process as per the below screen.
- That’s it. All done.
Note: If you face a MySQL database error while installing WordPress, in that case, the ‘MySQL username and user password’ length should be kept below 16 characters.
For example, you can enter the DB name as “db” and the user name as “user”. You can use any short name.
If you are using the Cloudflare SSL certificate, you should install the Cloudflare flexi SSL plugin and activate or you will see a redirect loop while loading the site.