How to install VPN client on Windows and Mac
Sep1: Download the installation file
Windows Users
Click here to download Windows 10/Server 2016/Server 2019 installer
Click here to download Windows 7/8/8.1/Server 2012r2 installer
Mac users may scroll down the page to see the installation steps.
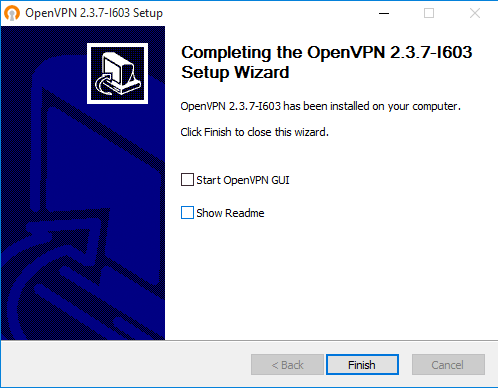
Step2: Run the downloaded file with administrator privileges and follow the installation steps. Confirm the Windows security messages.
Step3: Import the configuration file
Right-click on the VPN icon on the taskbar ( near the clock), and import the settings from the configuration file sent to you.
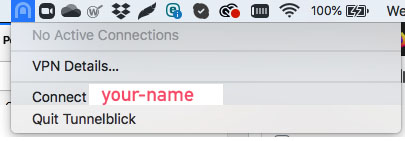
Step4: Connect
Right-click on the VPN icon on the taskbar and click on the connect menu next to your username.
How to install VPN client on Mac
Mac users can use the default VPN client or “Tunnelblick”. You can drag the configuration file into your VPN client.
Step1: Download Tunnelblick
Step2: Install Tunnelblick
Double-click on the file you downloaded in the previous step and go through the installation process.
Step3: Import the configuration file to Tunelblick
Double-click the user configuration ( sent by your IT team) file to import it into Tunnelblick.
If you see:
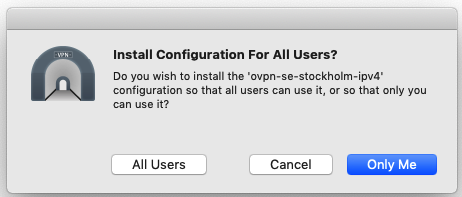
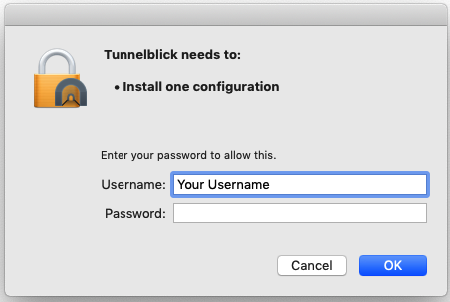
Choose Only Me. You might need to enter your password in order to allow Tunnelblick to install the configuration file.
Step4: Connect to VPN
The tunnelblick icon, which looks like a tunnel, should be visible on the upper right corner of your screen. If this is not visible, you may open the same from your Launchpad icon. Click on Connect next to your name